The other day I came across these rather large ceramic cacti created by artist Lina Cofán. At first glance, I assumed they were miniatures. I thought they would be cute on a shelf or coffee table as a little decorative accessory. However, upon further investigation I realized they were actually large ceramic sculptures so they weren’t going to work as I had hoped.

That’s when I decided to make some small cacti of my own. I’s actually been wanting to do a project with clay and this was the perfect opportunity. I ended up getting 1.75 lbs of Sculpey oven-bake clay through Amazon. This was plenty (with a bit left over) to make all five of these adorable little guys.
With ready hands and a can-do attitude, I got to work on my little colorful clay garden. At first I thought I had a project fail on my hands, but once I worked with the clay a bit, things came together beautifully. I’m thrilled with how the little cacti turned out.

Let me show you how to make them and also tell you about a few lessons I learned along the way.

DIY Clay Cactus Garden
Here’s what you will need:
oven-bake clay (I used Sculpey.)
clay tools (A toothpick would also work.)
baking sheet
acrylic craft paint
paint brushes
Sculpey gloss glaze
Begin by shaping your various cacti. I used some of Lina’s as well as real cacti as models and came up with a few ideas of my own. The clay may be a bit flimsy so try and keep it as thick as possible while still maintaining your design.

I did make a small hole in the bottom of some of the thicker pieces just so they would bake more quickly and I wouldn’t use up too much clay. I rolled out little snakes of clay to add texture to one cactus. For another one, I cut out a star shape to create a little flower on top.

Once you’ve shaped your cacti, use the clay tools or a toothpick to add texture.

Next, your cacti are ready to bake. Follow the directions on the package. I baked mine at 275 degrees F for about 45 minutes. Check on them while they are baking to make sure they stay intact.


After they are baked and completely cooled, paint them whatever color you’d like. I used various shades of green. For each cactus, I used two colors just to give them a little dimension.

And finally, to give your cactus a glossy ceramic look, apply two coats of gloss glaze, allowing it to dry in-between coats.
Finito! Your adorable little cacti garden is complete.
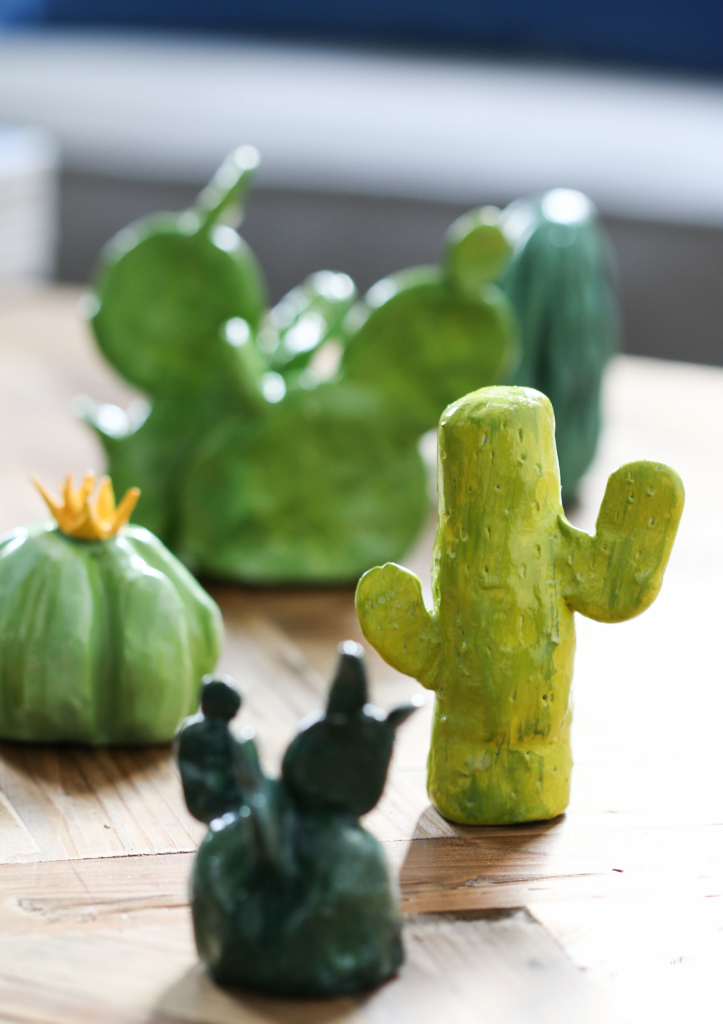
Tell me, aren’t they freakin’ adorable!? They will be such a unique accessory for a bookshelf or on a coffee table. These could also make a wonderful table setting decoration or a favor for a party. What do you think?
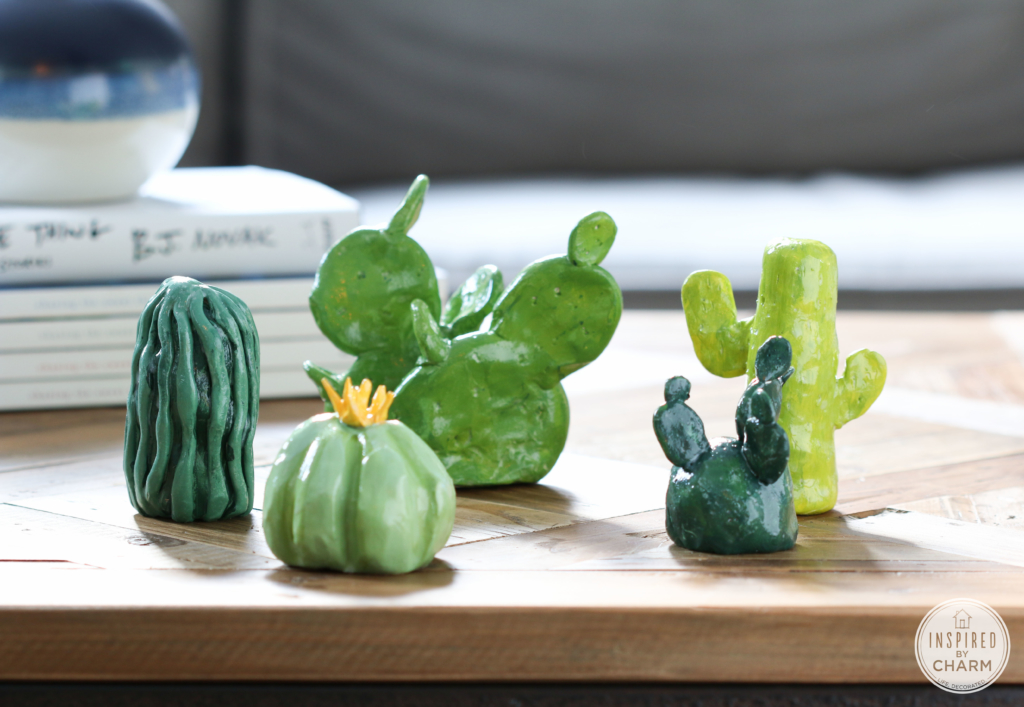
I think mine will eventually find a home in my office / living room space. I’m just in love with them.
Anyway, that’s it for today. I hope you enjoyed this little project. Join me back here tomorrow for an extra special post! You don’t want to miss it. I promise.